19th
September
2010
To get the usb connected Xbox Controller S working in Windows XP was quite easy using the XBCD drivers.

But installing them on a Windows 7 (64 Bit) system was quite a challenge due to the lack of information.

If you read about this topic you’ll find many tutorials in forums on how to get unsigned drivers working in Windows 7. But you don’t need any of this …
Just install the drivers for the 3 in 1 Magic Joy Box (PC035) for Windows 7. All analog axis work and even the force feedback (at least in Dirt 2).
posted in reviews, windows |
4th
March
2009
Coming back to coding Actionscript after a while I noticed that you got to fix more and more bugs over the years of Flash development. Yes there were many limitations with AS1.0 and AS2.0 using Macromedia Flash, MX and CS, but the recent movements in Adobe’s labs make me wonder where they want to go. For example using their mx.rpc packages with flex and AS3.0 gives me a lot of headache. Gladly I stumbled upon the “YAAB – Yet Another Actionscript Blog” and found this article about Remoting with BlazeDS from plain vanilla Actionscript 3 class. He summed up all the workarounds and problems you get when trying to work with Remoting from AS3.0.

At first I tried using Axis2 for remoting. But the recent versions of Axis2 Service Archive Wizard – Eclipse Plug-in and Axis2 Code Generator Wizard – Eclipse Plug-in are buggy at times when you want to achieve very simple tasks. To generate a services.xml and .wsdl file seems to work but stuffing em into some .aar package with the Archive Plug-in results a faulty Service Archive. So there was almost no possibility to change the session scope of the werbservice or access and register remote classes. Switching to BlazeDS gave some advantages. Now I didn’t have to build some .aar package because it just interprets my .class and .jar files. All I had to do now was looking for the right AMFChannel and now I was able to transfer complex Objects in both ways. I just wish I had found the YAAB blog entry a few days earlier.
posted in linux, mac os x, reviews, windows |
19th
July
2007
This time i wanted to post-process my exported Lightroom images without opening Photoshop. So i decided to use ImageMagick which has helped me before in lots of other situations. The task was to realize some very fine sharpening and frame the image with some very simple white line and some black border. I’ll describe it for Windows users in this article but OSX users should be able to adopt this with AppleScript very easily. Thanks to Pascal Abaziou i was able to shorten the batch file script by using the shift command.
Step 1
Download the Binary Release of ImageMagick for Windows ( Win32 static at 8 bits-per-pixel ) right here and install it to the default location (for me it was like “E:\Programme\ImageMagick-6.3.5-Q8”) with all default installation settings.
Step 2
Create a new text file on your Desktop using your favourite text editor (Notepad, Wordpad, Textpad, …) and save it as “USM_Border.bat” to your Desktop. Now lets fill it with some content:
@echo off

echo Processing…

:loop

if “%1”==”” goto endloop

if exist %1 call “E:\Programme\ImageMagick-6.3.5-Q8\convert.exe” -unsharp 0.3×0.4+0.45+0.05 -unsharp 0.2×0.3+2.0+0.05 -bordercolor White -border 1×1 -bordercolor Black -border 30×30 %1 %1

shift

goto loop

:endloop
Ok, save the file changes. Lets go through these lines a little bit to see what we’ve done here … if exist %1 just checks if there was an argument (filename) delivered by Lightroom … call “E:\Programme\ImageMagick-6.3.5-Q8\convert.exe” just calls ImageMagick at the location we installed it before (change this if your installation path is another) … -unsharp just calls the Unsharp Mask Filter, if you want to read more about its options, just go here … -bordercolor -border just create the border …
Step 3
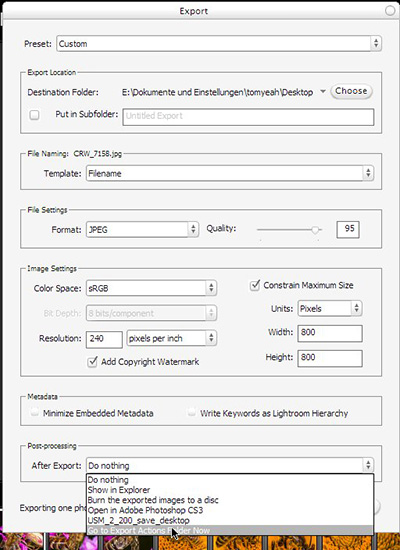
In Lightroom go to “Export” and in the “Post-Processing”-area you click “Go to Export Actions Folder Now”.
Next, move the previously saved batch file (“USM_Border.bat”) from your Desktop into Lightroom’s “Export Actions” folder.
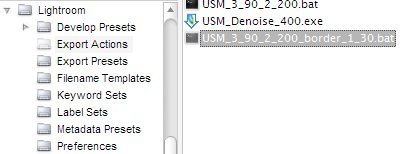
That’s it. Now you can choose the batch file in Lightroom’s “Post-Processing”-area as your “After Export”-action. You can download my recent batch file here.
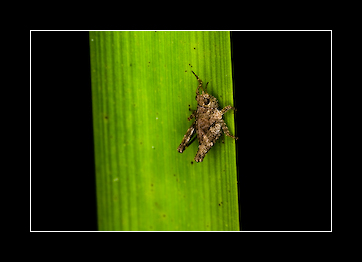
The result would look like this when exported as 300px image. It worked for me, but if you have any questions, just leave a comment here. (Sometimes this method won’t work if you have too many special characters in your file path or just spaces.)
posted in windows |
18th
July
2007
In my case i wanted to apply some extra sharpening after Lightroom exported some RAW files. But if you want, you can apply this tutorial to any other Photoshop actions: framing, noise reduction and whatever.
Step 1
Create your Photoshop action.
Step 2
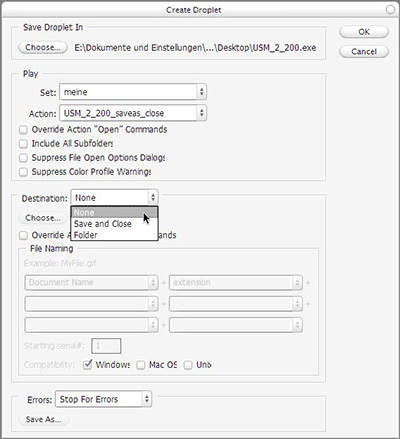
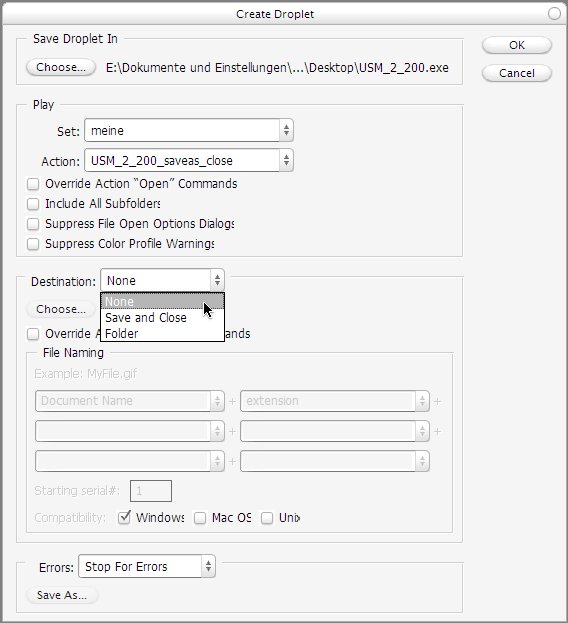
Create a Droplet for your Photoshop action.
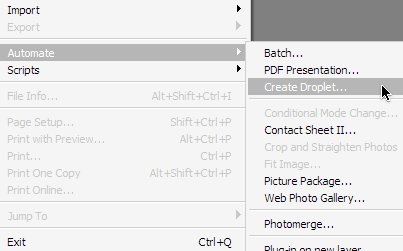
Save the Droplet to your Desktop.
Step 3
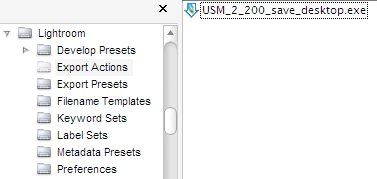
In Lightroom go to “Export” and in the “Post-Processing” area you click “Go to Export Actions Folder Now”.
Next, move the previously saved Droplet from your Desktop into Lightroom’s “Export Actions” folder.
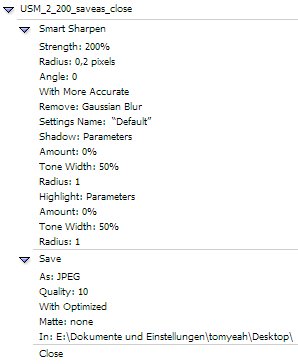
That’s it. Now you can choose the droplet that you saved before in Lightroom’s export options for “Post-processing”. This works pretty similar in Mac OSX and Windows XP/Vista. My default Post-Processing droplet is at the moment: Smart Sharpen, Noise Ninja, Save as Optimized Jpeg.
posted in windows |
18th
May
2007
Color perception is subject to ambient light levels, and the ambient white point. (A red object looks black in blue light.) It is therefore not possible to achieve calibration that will be perceived evenly in different lighting conditions. The computer display and calibration target will have to be considered in controlled predefined lighting conditions. Controlled lighting conditions such as D65 help to suppress the effect of metameric colors which would further complicate the issue.(source)
You don’t need an expensive color calibration tool (spyder, eye-one, or similar tools) in order to detect the white point of your ambient light. You got all you need with your DSLR already.
So lets go through this guide to get a quite nice calibration for your monitor.
At first look for the light sources in at your working place:
- Avoid these old yellow light bulbs for your room with the monitor and replace these with newer energy saving daylight bulbs.
- Try to avoid mixed lights of different color temperatures. Close the curtains or sunblinds of your windows.
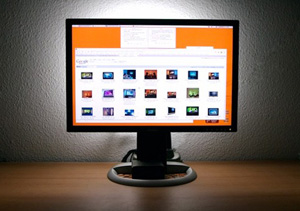
- Brighten up the area behind your screen by placing a lamp behind it. This will ease your eyes and even improve the quality of your displayed images in terms of black level quality.
Step-by-Step Tutorial:
- Place some neutral grey objects in the area behind your screen that you would see from the position where you are working. To make it simple: place some color chart on your wall or some medium grey coffee filter paper.
- Photograph your workplace including the color chart or coffee filter at your wall using RAW format. Expose the picture to your calibration object (try to capture it with a good brightness).
- Open your favorite RAW developer (CS2, CS3, C1, lightroom, …) and use the eye dropper tool
 for white balance detection on your coffee filter or color chart from your wall. Do it several times to average the color temperature. Next write down the color temperature.
- Ok now lets look at your monitor. Look into the OSD (On Screen Display) and for some color temperature settings here there and set the closest value to your inspected value. Some screens may support this feature. For the next step you don’t have to play with your monitor but with your mouse and keyboard again in the software. We need to modify the settings of your monitor profile in your Operation System:
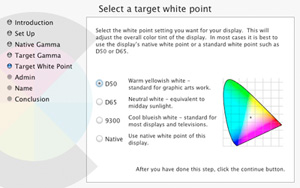
In OS X it is like this. Go to System Preferences > Displays > Color and choose “Calibrate…”, check that “Expert Mode”, click through to “Target White Point” and set your new color temperature here. If that looks too complicated for you, you can use the simple mode and choose what is next to your value out of D50 (5000 Kelvin), D65 (6500 Kelvin) or 9300 (Kelvin). If you think that your screen is too dark (happens with old monitors over time) you may adjust the gamma as well in the wizard, but only go for the monochrome gamma correction here.
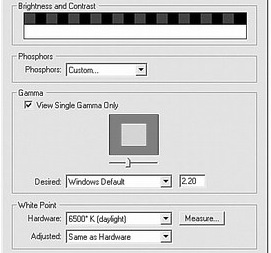
In Windows (XP and Vista) you need tools like “Adobe Gamma”, you get this with installing Photoshop, it is in your System Preferences area. Just choose your white point here by inserting the Kelvin value that you inspected before as the “Adjusted Value” and if you were able to select a color temperature in your OSD before you need to set this as the white point of your “Hardware”. If you got some old screen you might adjust the gamma here as well, but not on the single colors, just do it for the monochrome setting.
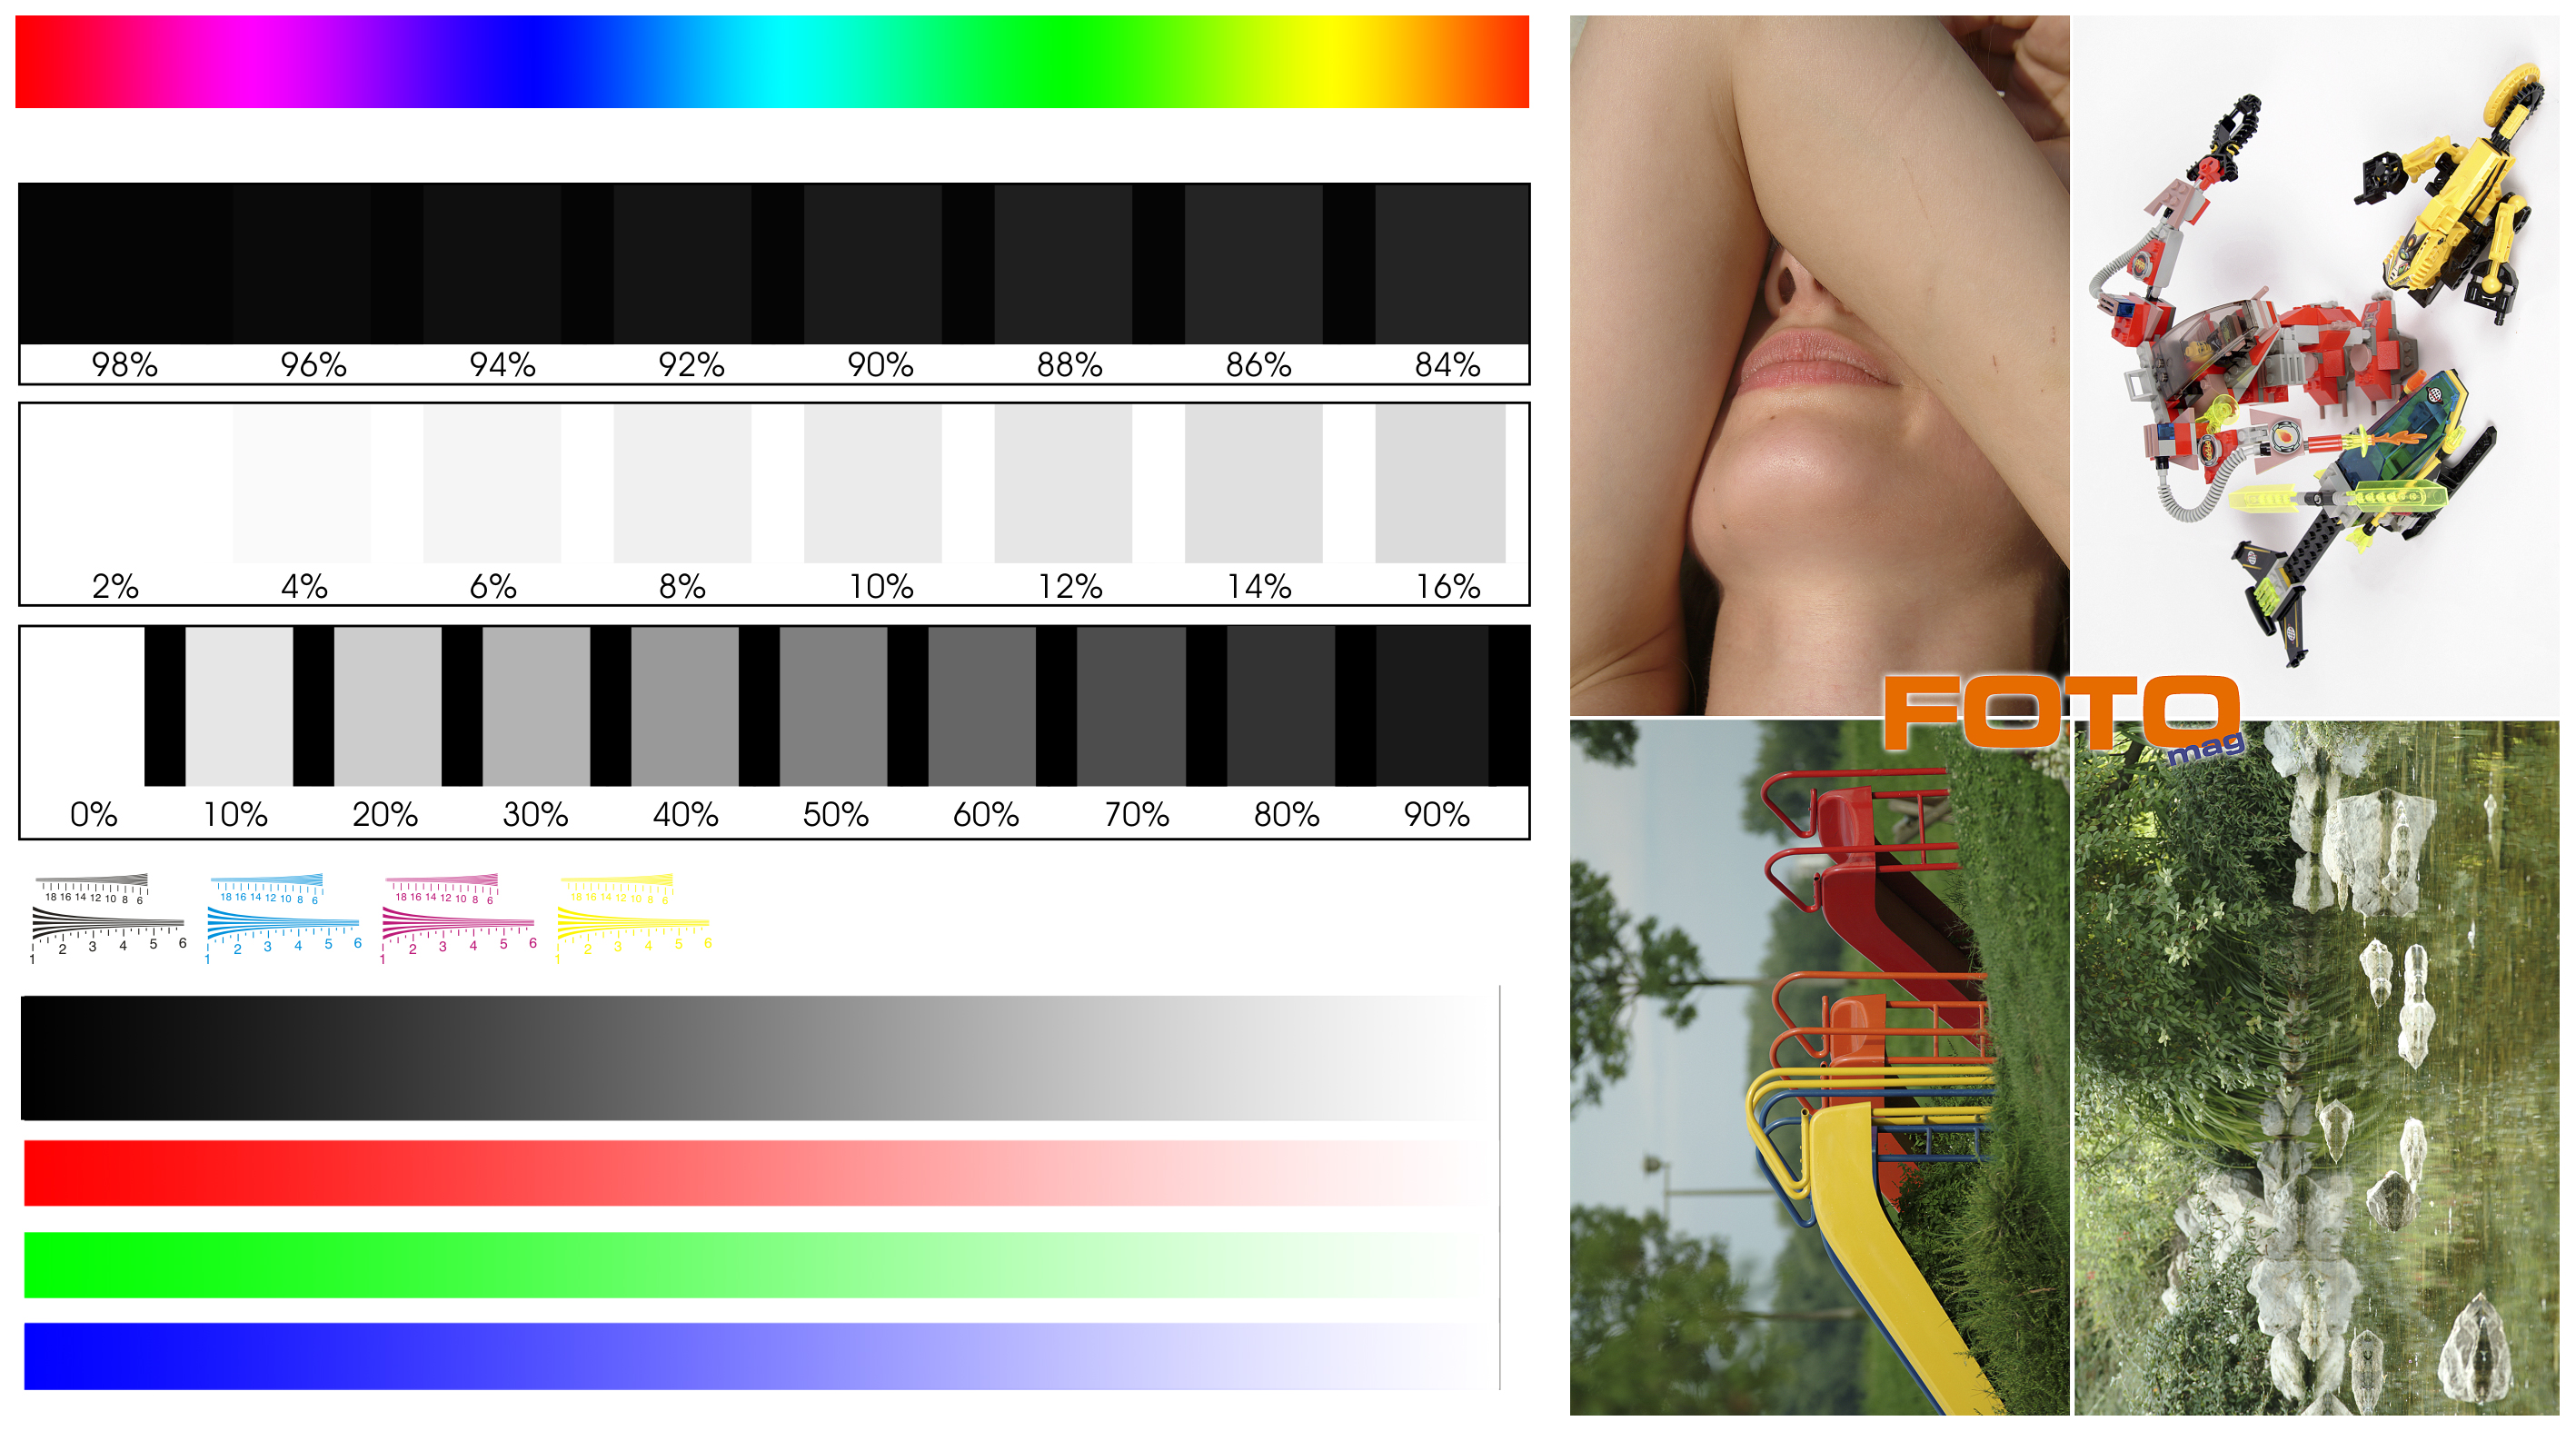
Ok, now comes the hard work. Open some color calibration chart (for example this one) on your screen with your favorite image viewer.
- Take your camera and make a picture of your working place with the color chart displayed on your monitor and the background area around your monitor with the coffee filter oder the color chart on the wall.
- Open the picture in your RAW editor and look for the color chart that was displayed on your monitor. Aim with the eye dropper tool for the grey value in the color chart that is almost as bright as your wall behind the monitor. Write down the inspected color temperature.
- Now its time to work with your monitor. Open the OSD (On Screen Display) and go to the color settings. Switch from the “normal” setting to the “user preset” and start with all values at factory settings, mostly r:50 g: 50 b:50 . Change one or more values in order to achieve your target white balance. If you need it warmer just add a little red and reduce the blue. But try to keep the average of all 3 values at about the half of your scale. For example if my scale goes from 0…100 i want it like (R + G + B) / 3 = 50. Write these 3 values down and go back to Step 1. to look how close you came to your target value and do it all over again until you reached your target value.
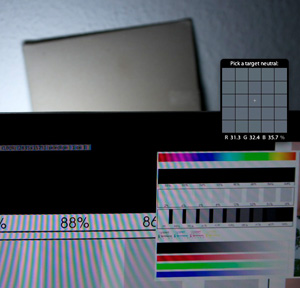
Things that prevent your success:
- Your target is not really neutral grey. (see picture below)
- You go to close to your screen and get weird colored lines on your picture. (see picture below)
- Your backlight is too weak and monitor too bright or vice versa. Just tune your monitor brightness. (see picture below)
It took me like 5-6 tries to come close to my target values. I got daylight bulbs at my working place at a color temperature of 5450 Kelvin.
Now it is your turn. Good luck with this.
posted in mac os x, reviews, windows |
6th
March
2007
In the old days I was a big fan of ACDSee 4.0 , but it lacks of proper RAW support, because I always had problems with their buggy RAW plugin. The following versions became slower and slower and slower, not really usable in terms of speed. Next I became a user of IrfanView. It was fast but the video viewing capabilities were too slow on loading. Next I came to Picasa 2 which is not really meant for a double click in the explorer and exit by pressing Esc. Too slow for quick folder browsing. My latest discovery was XnView. It took quite long to startup and needed 2 times Esc pressing.
Than I came to FastStone. The FastStone Image Viewer 3.0 didn’t offer any skin that was looking good with my milky style. Although it had that problem with Multi-Page-Image-Files. When browsing a folder, it always get stuck on these types of images ( .tiff in my case ). But FastStone offers a smaller tool, called FastStone MaxView 2.0 (freeware). You can use it as a borderless window which makes it fitting into every environment without esthetic problem regarding the window manager style.

Why I like about it:
- fast startup from double-click in the Explorer
- exit by pressing Esc once
- excellent magnifier customization
- very fast image browsing, even on big images ( 4096×4096 and bigger )
- moving the mouse to screen edges brings up additional menus
- continuous browsing by holding down the arrow keys
- blazing fast on browsing folders with RAW files ( using embedded preview images )
posted in reviews, windows |
21st
January
2007
I’ve been using the bitvise Tunnelier for quite some time now in Windows XP and it is a real pleasure to use this easy tool.

For Mac OS X i couln’t find a tool like that until i came to the SSH Tunnel Manager . It is even easier to use than the windows tool and does a great job on tunneling your network traffic through firewalls. So you can have secure access to your non-ssl email accounts or just secure your traffic in a big company network. Ofcourse you still need some server outside your network with some ssh shell running.
posted in mac os x, windows |
12th
January
2007
Just downloaded this neat addon from mozillas addon site.

The only problem was the slow cube rotation speed.
You can change the cube rotating speed in the content/javascript.js file of the addon.
Just change
TabEffect.xpcomObj.translateToNextTab(back, 24);
to
TabEffect.xpcomObj.translateToNextTab(back, 12);
and the speed is doubled.
You find the file in (for windows xp users):
Drive:\ Dockuments and Settings\ UserName\ Application Data\ Mozilla\ Firefox\ Profiles\ YourProfile.default\ extensions\ {0784CD66-62FE-4cef-ABF4-F8ED9B654ACC}\ content\ javascript.js
worked for me.
posted in linux, mac os x, windows |
11th
January
2007
On my search for a new desktop background I stumbled across these Earth-Desktop-Tools like EarthDesk 3.5 (Win and OSX payware), Desktop Earth 2.1 ( Win freeware), OSXplanet (OSX freeware).
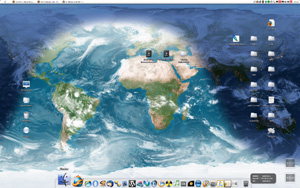
EarthDesk 3.5 looks like the screenshot above. If you don’t use Active Desktop in Windows it will just generate a resulting image (map + cloud layer) and update your recent wallpaper. I wonder how long it can draw my attention until it gets boring and will be replaced.
posted in mac os x, reviews, windows |
31st
July
2006
A few days ago i found GimmeSomeTune 1.6 for iTunes on Mac OS-X. Now being back to Windows XP I needed a similar tool. Most important for me is not using such buggy widget engines like Yahoo! Widgets or AveDesk, sorry guys but your tools don’t work so well with other mods like RK Launcher or Entbloess 2.
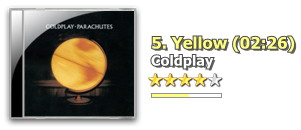
Close to Software created this awesome Freeware tool. It offers some nice skins and lets you modify lots of settings with their handy interface. It searches cover art images for your playing songs and saves em as folder.jpg in the according folders. On their website it says:
CD Art Display supports Winamp 5, AlbumPlayer 4.3e and iTunes 6.It also supports Winamp 5 API enabled players such as foobar2000 (with Winamp API Emulator plugin) and MediaMonkey.
Awesome software, I will test it the next days because it is not final yet (Release Candidate 4).
posted in windows |
31st
July
2006
When checking page layouts everybody wants to see their layouts as big as possible and sometimes wants to see the double page layout, just like a book  ( 2 pages next to each other on one screen).
Adobe Acrobat Reader in its recent version 7 doesn’t support this feature in their full-screen mode. So I had to search for some alternative PDF viewer.

FoxitReader (Freeware) is fast, starts in a split second and features double-page facing in fullscreen mode. Don’t be afraid of the ugly web-site and the more ugly screenshot.

On some properly theme-d Windows XP its looks really nice, even better than Acrobat with all its colorful buttons.
posted in reviews, windows |
31st
July
2006
Oh I hated that bug.
After finding nice mssytles like Milk or Smooth Stripes for Windows XP I mostly had this bug and somehow no font setting could fix it. Today I stumbled across some forum threads discussion this problem and they really found the solution.
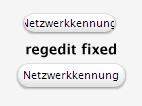
Just open your Registry-Editor (regedit.exe) and go to the
HKEY_LOCAL_MACHINE\SOFTWARE\Microsoft\WindowsNT\CurrentVersion\FontSubstitutes
and fix the both values of “MS Shell Dlg” and “MS Shell Dlg 2” by setting em to “Lucida Grande” or whatever main system font you defined for your style.
posted in windows |
30th
July
2006
Well, I always complained about the threading problems in Firefox (Windows XP). For example Firefox won’t let you use any mouse gestures (e.g. switch to next tab) while it is loading plugins or just web-content in the recent tab. I guess the plugins just have lower priority than the render engine. But you can still use the keyboard shortcuts to switch the tabs at all times.
In Mac OS X I had the problem that some browsers don’t support mouse gestures at all.
So I had to find some application for Global Mouse Gestures on both systems.
Lets start with Windows XP.

StrokeIt (0.9.5) is some great Freeware tool that lets you define global and local (for individual window classes) mouse gestures for all your needs. It even offers gesture feedbacks like line-drawings in individual colors. Since the global keyboard and mouse events have almost the highest priority in Windows XP it is much faster than any plugin for Firefox like Mouse Gestures 1.5.1 or All-in-One Gestures 0.17.4.
Now for Mac OS X ( PPC and Intel Mac).

CocoaSuite (universal binary), formerly know as CocoaGestures, was originally Freeware but the project was integrated into the new Payware CocoaSuite. You can still download the old CocoaGestures 1.2 from MacUpdate but I guess it only works on PPC. So CocoaSuite works only on for Cocoa apps and costs like “US$14.95” recently. It works pretty well and 30–day trial is OK for AppZapper if you know what I mean.
posted in mac os x, windows |
2nd
June
2006
Just got my new mouse and started reading about mouse sensor technology. I found this very detailed report about state-of-the-art mouse-sensor-technology. Additionally i found this site with sensor manufacturer specs of some sensors.
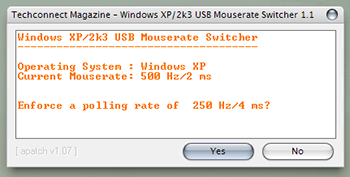
After some research in various forums i found this USB Mouserate Switcher 1.1. You can tune up and down your USB polling rate (System’s USB driver modification) from standard 125 Hz (8ms) to 250 Hz (4ms), 500 Hz (2ms) and finally 1000 Hz (1ms). Some people reported a mouse freeze after reboot, so you better enable your Keyboard Mouse Emulator in Windows XP’s Accessibility options. I set mine to 500 Hz and had no problems with my a4tech mouse.
posted in windows |
30th
May
2006
At first, there is no equivalent like Adblock + Filterset.G in Mozilla Firefox for Opera 9 that is as comfortable and efficient.
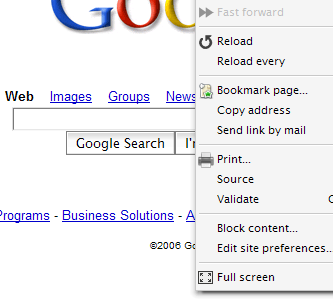
Opera 9 (beta 2) offers the “Block content…” option in its content menu. After pressing it you get some nice preview of what is being blocked from the site.
Basicly they use the filter.ini file in Opera’s profile folders. Its a simple list of urls that specify excludes and includes. There have been external tools like OperaAdFilter(link died) and FlashBlock . You can although use external proxy tools that control your whole web traffic for all applications so you could block icq ads and opera ads with one tool. But these tools all suffer from very basic problems. If you block some ads on a web-site the place on the web-site is simply left empty and web-sites look a bit chaotic and unfinished. Adblock in Firefox handles this a lot better. The fact that opera integrated this feature in its gui shows that the developers listened to user requests. Lets hope Opera’s “Block content…” will be as good as Firefox’s Adblock in the final version.
Update: Final Version of Opera 9 is out and i found this neat link with some up-to-date Filterset in Opera 9 format . It works pretty well so far. But you still cant edit the color of the nasty yellow “special effect”. By the way, if you can’t find the urlfilter.ini in Mac OS X:
/Users/[username]/Library/Preferences/Opera Preferences
if its not there just go back to opera and use ‘tools – advanced – block content’ and create a sampe block. Than the file will be created.
posted in linux, mac os x, reviews, windows |
27th
May
2006
Just downloaded the Opera 9 beta 2. …. gawd Opera looks pretty ugly. Went to their skin site, but there is no decent one. All i found was this grubby forged one, with its suited name fantastic . After that i noticed that customizing Opera is not as easy as i’m used to in Firefox. For example moving the tab-bar below the address bar, which doesn’t sound hard but you got to work around a bit. On this thread i found some lil guide to solve this mystery.
– turn of the Opera default address bar with “CTRL+F8”
– right click on the main toolbar -> “customize”
– choose “Buttons” -> “Browser view”
– then you can drag the “address bar button” and drop it into the main bar at any place you like
– press “ok” to close the app. window
Maybe there are good Opera themes but hard to find.
Update: I found some sweet skin.
1. Go to this website and select the “Odyssey” skin.
2. in the “Skin selection” drop-down-menus select “All” in the left one and than “Browser skin” in the right one
3. Now set all Paddings to “0”, press “save” and “download” on bottom right
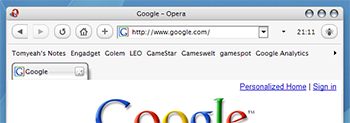
So there is a last “feature” to get rid of, the nasty yellow special effects glow. I’ve read that it is a system color (windows tool-tip color) but somehow thats not right. In the official opera forum they created some “Opera Standard modified” skin without the yellow glowing in the scrollbars and buttons. nontroppo has modified his Breeze skin as well to fix this “feature”. I guess in the final Opera 9 this wont be a problem anymore and you can select the special effects color within opera.
posted in linux, mac os x, windows |
14th
May
2006
I’ve been experiencing heavy keyboard and mouse lag in recent direct-x games. Searching the web i found several attempts in solving this program issues. In the old days when Half-life 1 came out it was quite easy to switch from direct-x to opengl but now-days its not that easy anymore.
One solution was to look for the windows xp keyboard filters (repeat rates, delay rates, …).
windows xp – control panel – accessibility
and
windows xp – control panel – keyboard
Here you can find various settings “Ignore quick keystrokes and slow down the repeat rate”, “Slow down keyboard repeat rates” and so on. One strategy might be to decrease all repeat rates and delays to their minimums, but does it make that much sense if the game isn’t able to process your input fast enough and you even raise the input rate ? And wont the game set its own delay and repeat rates for the game input ? Well, it seems like it worked for a few people but not for me.
So i kept on searching and found another method that although worked for a few people. It seems like a few direct-x games set its own priority level above the keyboard/mouse priority level.
check with ctrl+alt+del in the process tab – right mouse button on a process – check priority
Now you can set the game priority back to normal, because some people complained that the advanced warfighter demo sets its priority itself to high. In this thread they discuss various methods of launching a game with a certain preset priority, ranging from writing your own batch (.bat) file to just use the “/NORMAL” attribute for the windows xp application link.
So, did it work for me ? No ! I just used the CPU settings “Maximum” and the Graphic Card settings “Medium” in the Condemned game settings and it was “playable”. I guess its a problem of the Post Effects in direct-x in combination with FSAA and AF. I’ve experienced a similar problem with the post fx in trackmania sunrise, but there it just had an effect on the graphic delay and didn’t cause an input rate delay.
posted in windows |
11th
May
2006
Finally FlyakiteOSX 3.5 (i tried the german version) works flawlessly. In the early version i always had some bugs with the Y’z Shadow and the dock-bar, but this time everything works just from the start, without additional configuring. It is recommended to use the included “Rebuild Icon Cache” tool if you finally found or created all icons for your desktop, this will speedup the start-up.

The only tool i had to add was some look-a-like tool for apple’s Exposé. The very nice Flyakite Guide “Welcome to FlyakiteOSX v3.5” had nice suggestions for this purpose. I tried TopDesk v1.3.5 (trial) which was a very excellent tool and i was about to actually buy it, but their web-site was down and no other share-ware shop offered it. Bad luck for you Okatu Software ! So i went with Entbloess v2.7.2 . I tried that software like a year ago or so and i got this nasty flicker effects when going to the “tile all windows” view. The 2.7.2 does a very good job with its “PrintWindow” method. I got fast and smooth animations after i disabled the “Zoom previews when highlighted” option. Somehow the performance is bad with that mode when you have high quality previews. The Lucida Grande (bold) looks very good on my desktop symbols in combination with Cleartype.
Additional Links: osx-e.com nice collections of links and articles, panther icons , more extensive guide to extend FlyakiteOSX
posted in reviews, windows |
11th
May
2006
Just found this neat Windows Media Player skin (WMP10 but works on WMP9 as well).
Its the best one i found so far. If anyone has a better Graphite skin for WMP please tell me. Good looking play-list and player window is most important for me.
posted in windows |
11th
May
2006
Yak, just installed and played Spellforce 2, started to like the game and played a few levels. Next day i tried launching the game and got this nasty “Runtime Error”. So what was wrong ? I’ve heard that changing the system configuration might disturb the starforce copy protection but i didn’t change anything.

After some research in the web i found out that changing the folder attributes of “..\My Documents\SpellForce2” to “hidden“ causes this problem. What a stupid error ?! I think its pretty boldfaced to force the users having their save-game folder in their clean My Docs folder.
posted in windows |
5th
February
2006
Dealing with HDTV movies from newsgroups (usenet binaries) i had to join many .ts files ( movie.1080i.0001.ts , movie.1080i.0002.ts, movie.1080i.0003.ts , … ).
I found this little java tool called NullPacketStripper . One of its features is “ automatically merge files following the filename.nnnn.ts (with nnnn being a 1-4 digit number) pattern “. You need to have a 1.4.x JVM installed. Just start the program NullPacketStripper.jar and select your movie.1080i.0001.ts as “Input file(s)”, press “Start processing” and wait until all parts are merged.
Ok and now something for the people that don’t like java. If the .ts files are split correctly you can simply join the files using your OS built in copy functions.
In windows just move all .ts files into one folder. Go to “DOS” command line (cmd.exe), navigate to your folder with the .ts files and type:
copy /b *.ts output-file.ts
or output the file to another drive like e:\
copy /b *.ts e:\output-file.ts
In linux it shouldn’t be that much harder. Just use the cat command.
posted in reviews, windows |
18th
January
2006
Just found this link at dell’s web site offering the display driver and colour calibration profile for the dell 2405 fpw ( manual ).
I’ve been searching quite a lot since there is no driver on their documentation CD nor you can find it in their download center.
To make it running in Linux (SUSE 10 with gnome) i had to add the following modeline to my xorg.conf ( command: sudo gedit /etc/X11/xorg.conf ) and set the correct resolution in the gnome control center ( “Screen Resolution”).
- Modeline “1920x1200_60.00” 154 1920 1968 2000 2080 1200 1203 1209 1235 +HSync -VSync
And since i had my old CRT monitor connected to the d-sub connection on my 6600GT i had to add in the “Device” Section:
- Option “ConnectedMonitor” “DFP”
- Option “IgnoreDisplayDevices” “CRT”
But there is still a problem. In Linux i got heavy tearing in games and on the overall work-flow. Windows XP doesn’t show this effect so i wonder what’s the difference.
posted in linux, windows |
2nd
December
2005
Looking for some easy to use PDF-Maker and looking at Adobe’s price list, I had to find some free tool thats really easy to handle.

rarefind offers the Paperless Printer® . It works like a common printer in Windows XP. When you selected any document in any application to print, the software just asks you what format you prefer: PDF, HTML, RTF, EXCEL, JPEG, BMP. You press “OK” and its all done !
I found this tool pretty neat for using online fax services for sending some signed contract to my domain provider. In order to get the print view of a web-document you got to print it. But with this tool you just print it to some BMP file, edit it in your graphics editor(paint, photoshop, …) and send it to some online fax service (tiscali.de or fax.de for germany). So you saved paper and didn’t pay anything for the fax (fax.de gives you 10 free fax messages).
posted in reviews, windows |
1st
December
2005
I just finalized my DScalerScheduler Project. Instead of using different modules as before there are now only 2 applications.

Just put the DScalerScheduler-folder into your TvBrowser-folder like on the picture above. In TvBrowser just set the scheduler.exe for your Capture-Plugin. Than set these parameters for recording.
{start_day} {start_month} {start_hour} {start_minute} {end_day} {end_month} {end_hour} {end_minute} {channel_name_external_quiet}
Set up the external channel assignments according to your channel layout in DScaler and thats it. The DScalerScheduler looks like this. I’ve added some extra buttons in order to test the initial functions with DScaler, so you wont have to wait for the first record to see if it works at all. And as before you can minimize the application to tray by double-clicking on the tray-icon.
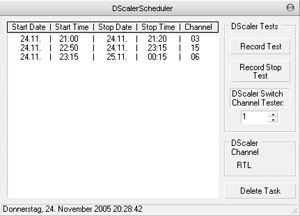
You can download the DScalerScheduler here: download
It works with the new DScaler 4.1.14 and .Net Framework 1.1 .
Comments and reports are welcome.
Update:
I tried DScaler 4.1.15 and there is a new limitation.
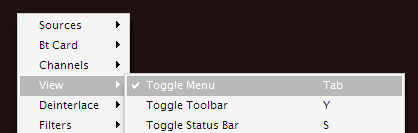
Somehow things changed in 4.1.15. Don’t ask me why and how. But now you have to Toggle Menu to visible.
Its not possible to pass any other keys than [0–9] to DScaler with WM_CHAR. So I can’t implement the new key combos Shift+R and Shift+S.
Just for the info: DScaler is not meant to be a recording program for TV shows. Thats what they told me in their forums, so there won’t be any further support from them. So we have to deal with the problems and limitations.
Well, and about that remote launch of DScaler.exe … I don’t like it myself when apps start out of nowhere while playing games or watching dvds and so on, same with hibernate and shutdown. There are endless tools around the internet to do that functions and lots of people use em everyday (Shutdown Timer v1.0.3, Shutdown4U 3.6, and so on).
posted in windows |
30th
November
2005
In one of my favourite forums i found this thread about photography tools for creating high dynamic range images of your own exposure bracketing. It is just a command line application but the results are awesome. I’ve used the HDR Shop before but even with the tone-mapping plug-in the result weren’t good at all with glowing edges and visible seams all over the image.
The new MKHDRI tool uses this method by Greg Ward for automatically matching picture positions. The newest version of MKHDRI and HDRI2LDRI (for low dynamic range compression, jpegs for your crt monitor) can be found here: Version 1.04.02 20.11.2005. The software itself is in english but the tutorial is only in german so far. But its quite easy to use.
c:\ mkhdri -a -co:myCurve.txt -out:myPic.tif myPics\*.tif
For generating the camera curves into the myCurve.txt .
c:\ hdri2ldri -ic:myCurve.txt myPic.tif myPic_ldri.tif
For generating the final LDRI (low dynamic range picture for your crt monitor capabilities). You can get more information by just using the inbuilt help.
c:\ hdri2ldri -?
For getting help.
So there are basicly 2 simple steps.
1. Creating an High Dynamic Range Image and the camera curve (MKHDRI).
2. Using the camera curve to create some Low Dynamic Range Image for your photo gallery (HDRI2LDRI).
He plans to make some nice GUI (graphical user interface) for it, so you have more comfort when generating your LDRI images.
posted in reviews, windows |


