Lightroom Post-Processing with ImageMagick
This time i wanted to post-process my exported Lightroom images without opening Photoshop. So i decided to use ImageMagick which has helped me before in lots of other situations. The task was to realize some very fine sharpening and frame the image with some very simple white line and some black border. I’ll describe it for Windows users in this article but OSX users should be able to adopt this with AppleScript very easily. Thanks to Pascal Abaziou i was able to shorten the batch file script by using the shift command.
Step 1
Download the Binary Release of ImageMagick for Windows ( Win32 static at 8 bits-per-pixel ) right here and install it to the default location (for me it was like “E:\Programme\ImageMagick-6.3.5-Q8”) with all default installation settings.
Step 2
Create a new text file on your Desktop using your favourite text editor (Notepad, Wordpad, Textpad, …) and save it as “USM_Border.bat” to your Desktop. Now lets fill it with some content:
@echo off

echo Processing…

:loop

if “%1”==”” goto endloop

if exist %1 call “E:\Programme\ImageMagick-6.3.5-Q8\convert.exe” -unsharp 0.3×0.4+0.45+0.05 -unsharp 0.2×0.3+2.0+0.05 -bordercolor White -border 1×1 -bordercolor Black -border 30×30 %1 %1

shift

goto loop

:endloop
Ok, save the file changes. Lets go through these lines a little bit to see what we’ve done here … if exist %1 just checks if there was an argument (filename) delivered by Lightroom … call “E:\Programme\ImageMagick-6.3.5-Q8\convert.exe” just calls ImageMagick at the location we installed it before (change this if your installation path is another) … -unsharp just calls the Unsharp Mask Filter, if you want to read more about its options, just go here … -bordercolor -border just create the border …
Step 3
In Lightroom go to “Export” and in the “Post-Processing”-area you click “Go to Export Actions Folder Now”.

Next, move the previously saved batch file (“USM_Border.bat”) from your Desktop into Lightroom’s “Export Actions” folder.
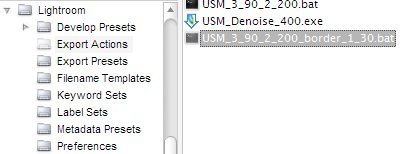
That’s it. Now you can choose the batch file in Lightroom’s “Post-Processing”-area as your “After Export”-action. You can download my recent batch file here.
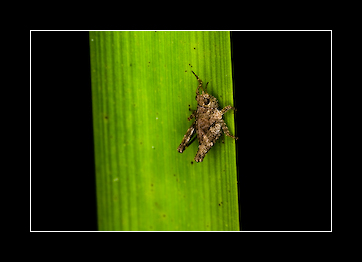
The result would look like this when exported as 300px image. It worked for me, but if you have any questions, just leave a comment here. (Sometimes this method won’t work if you have too many special characters in your file path or just spaces.)