Lightroom Post-Processing with Photoshop Actions
In my case i wanted to apply some extra sharpening after Lightroom exported some RAW files. But if you want, you can apply this tutorial to any other Photoshop actions: framing, noise reduction and whatever.
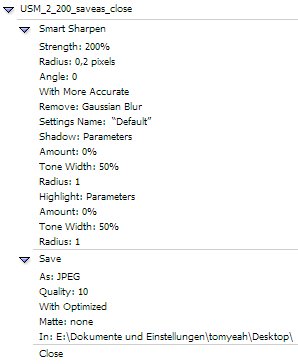
Step 1
Create your Photoshop action.
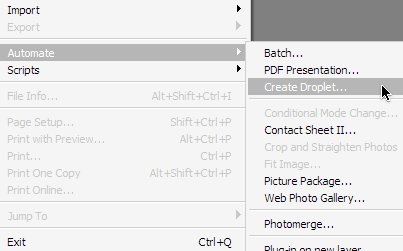
Step 2
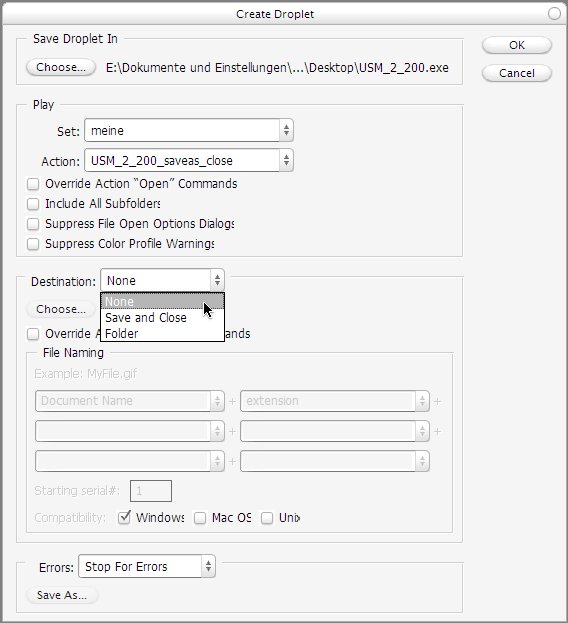
Create a Droplet for your Photoshop action.
Save the Droplet to your Desktop.
Step 3
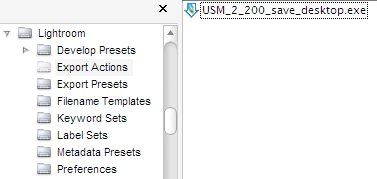
In Lightroom go to “Export” and in the “Post-Processing” area you click “Go to Export Actions Folder Now”.

Next, move the previously saved Droplet from your Desktop into Lightroom’s “Export Actions” folder.
That’s it. Now you can choose the droplet that you saved before in Lightroom’s export options for “Post-processing”. This works pretty similar in Mac OSX and Windows XP/Vista. My default Post-Processing droplet is at the moment: Smart Sharpen, Noise Ninja, Save as Optimized Jpeg.